2 UI基礎設計
**若在檢視預覽畫面,看到以下錯誤警告,請切換 api版本至比較低階的版本


2-1 xml撰寫
<?xml version="1.0" encoding="utf-8"?>
<RelativeLayout xmlns:android="http://schemas.android.com/apk/res/android"
    xmlns:tools="http://schemas.android.com/tools"
    android:layout_width="match_parent"
    android:layout_height="match_parent"
    android:paddingBottom="@dimen/activity_vertical_margin"
    android:paddingLeft="@dimen/activity_horizontal_margin"
    android:paddingRight="@dimen/activity_horizontal_margin"
    android:paddingTop="@dimen/activity_vertical_margin"
    tools:context="com.nutc.user.testapp.MainActivity">

    <TextView
        android:layout_width="wrap_content"
        android:layout_height="wrap_content"
        android:text="Hello World!"
        android:textColor="@color/colorPrimary"
        android:id="@+id/TextView1" />
</RelativeLayout>
每個xml須包含一個根元素,以上述程式碼為例
根元素:RelativeLayout 子元素:TextView
2-1 Layout版面配置
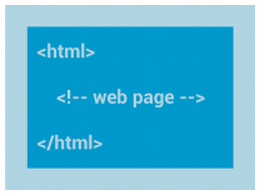
| Linear Layout | Relative Layout | Html in WebView |
|---|---|---|
 |
 |
 |
| 分為水平切割或垂直切割 | 可讓各種物件以關聯關係定位,例如指定A物件緊貼著B物件的左側 | 可用網址連接網頁 |
2-1-1 LinearLayout
<LinearLayout xmlns:android="http://schemas.android.com/apk/res/android"
    android:layout_width="match_parent"
    android:layout_height="match_parent"
    android:paddingLeft="16dp"
    android:paddingRight="16dp"
    android:orientation="vertical" >
    ......
</LinearLayout>
android:orientation="vertical" //垂直
android:orientation="horizontal" //水平
2-1-2 Relative Layout
讓a物件位置排在著b物件的下方
android:layout_below="@id/b物件id"讓a物件排在畫面最上下左右端
android:layout_alignParentBottom="true"
android:layout_alignParentTop="true"
android:layout_alignParentLeft="true"
android:layout_alignParentRight="true"
- 讓a物件水平位置與b物件切齊
android:layout_toRightOf="@id/b物件id" //讓a永遠在b右邊
2-1-3 wrap_content與match_parent
wrap_content:配合內容大小調整大小
match_parent:與父元素相同
注意:每個layout都要設定layout_width與layout_height參數
2-1-4 margin & padding
margin為物件外圍寬度,padding為物件與內部寬度
若內容設定為
10px 5px 10px 5px ->上右下左
10px->上下左右皆為10px

2-2物件id
任何一個view上的物件都有一個id,用來辨別目前使用的是哪個物件
android:id="@+id/TextView1"
@開頭 告訴XML解析器此後面字串是什麼字串,+號告訴系統必須建立此id並且將之加到R.java檔案
可以與下述程式碼比較看看差異
android:textColor="@color/colorPrimary"